Wednesday, September 19

Six Ways to Use the Charming Cottage Year-Round

Welcome to another wonderful blog hop with Amazing Paper Grace by Becca Feeken for Spellbinders. Becca designs the most wonderful dies and her new range A Charming Christmas is no exception. It's less than 100 days til Christmas, so it is a great time to get a head start on cards and gifts. 

Today we are featuring the Charming Cottage die. This is designed to be a little Christmas gingerbread house, but the team have been discovering so many more very cool ways to use this die. Today on the blog hop you will see at least 6 different ways that you can use this very versatile die set all year round for many different occasions which makes it a great addition to any crafting stash. 
A little while ago, I shared with you a Christmas themed box, so I'll start with that one. I plan on making these filled with cookie, chocolates, nuts, etc as small gifts for friends this year. 


Next up, I have a new project to share to show you another way to use the same die set. This time, I decided to create a birthday themed box. I used some pretty patterned paper for the background, and added a tiny sparkly border for a celebratory feel.  You could make the same design in bright colors for a child, or in darker colors for a male. The possibilities are endless. 


As you will have seen from my team mates, there are so many ways that you can use this die. I love how some of the samples have a window cut from them, and better still, the die to make this happen IS included. You could also use any small decorative die for a cut out effect like Melissa did.  I also love how Joanna created a tiny Christmas diorama for her project. How amazingly cute and clever. It would make the most wonderful Christmas ornaments. 

Imagine giving one to a friend moving into a new house! How cute would that be. I know you will want to make one straight away, so be sure to check out the super cute Halloween boxes that Teresa made. 

So, hopefully by now you have loads of ideas milling around your head, I know that your next question will be...How do I get one? Of course, I am here to help, so here are the details:

The Charming Cottage die is available on the Spellbinders website.  UK Creators may purchase it at https://hopeandchances.co.uk and although it has sold out, stock is expected quickly and it can be preordered to ensure getting one.

To thank you for hopping along with us, we will be giving away one die of the winners choice, (excludes A Charming Christmas) to  1 commenter picked from the combined comments on all 6 six blogs and is open to international commenters. Winner will be posted on the Amazing Paper Grace blog on Monday, September 24, 2018

Here is the link to all the blogs:


For one last piece of exciting news....
Please be sure to save the date.  Watch Becca on Hochanda on September 25 at 6pm, 8pm and September 26 at 9am, 1pm and 5pm 

Thanks so much for hopping by
Alicia 

Thursday, September 13

Be Jolly with A Charming Christmas

I'm back with a fun easel style card to share using the wonderful new collection; A Charming Christmas by Becca Feeken for Spellbinders. Even though the main motif for this card is a snowflake, I really like the look of it against the red background, as opposed to a wintery blue that I might typically use.


The Charming Snowflake Doily set comes with the large snowflake, plus a small snowflake and angel ornament die.

The large snowflake die has lots of pretty little details, so I wanted to be sure that they stood out on my card. I found that the white on red really popped. Once I mounted the die on the red, I then mounted it onto gold glitter card and trimmed to create a sparkly little border.


I wanted the snowflake to be the main focus point of the card, so to emphasise it, I trimmed around the bottom half of it, so that when standing the easel up, the snowflake becomes three dimensional. 


I used the Charming Christmas Words die set for the "Noel" border. It was slightly longer than the width of my card, so I mounted it on red and gold to match the snowflake, and gave it a little bow in the centre to create dimension and to also create a little stop so the card can stand up. 


 Go to the Spellbinders website to see the entire collection, and as alwasy check out the amazing work from the rest of the Design Team.

Wednesday, August 29

A little Christmas Sparkle with Amazing Paper Grace


I'm back with another Christmas crafting project to share using the wonderful new collecting A Charming Christmas by Becca Feeken for Spellbinders.


Today I have created a sparkly little gift box using a die set that is called Charming Cottage Box and is designed to be a little gingerbread house box. The set includes doors and windows and even roof shingles. Of course it also has a sweet little gingerbread man and a Christmas tree. You can be sure that I will be making lots of little gingerbread house gifts this year, so be on the lookout for that. 

Today however, I decided to keep it simple and elegant and just use the frame of the house to make a more traditional gift box. From the Charming Cottage Box set, I have used the box frame, and the leaves.


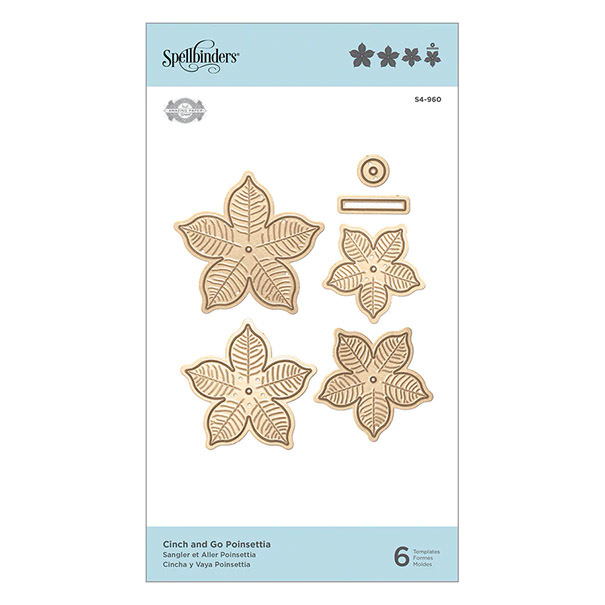
Of course I made lots of beautiful poinsettia flowers using the Cinch and go Poinsettia set.


The holly leaves comes from the Holly Jolly Christmas set.

I used one of the inserts from the Charming Round Tag set for the sentiment at the bottom.


 Go to the Spellbinders website to see the entire collection, and as alwasy check out the amazing work from the rest of the Design Team.

Saturday, August 25

Gypsy Soul phone holder

This past week, I started at a new school. It's been a while since I had my own classroom, so it has been a lot of fun decorating, and my skills as a paper designer have definitely come in handy.  Unlike my craft desk at home, I like to keep my work desk very neat and organised, but something I have already noticed is that I keep putting my  phone down  during the day, and it gets hidden under math papers and kid drawings.


To try to combat the problem, and to make my desk look pretty, I have created this holder for my phone with the Gypsy Soul Laser Cuts ipad and phone holder. This is actually the second one I have made. I also made one for my son a while ago. This is a simple three piece set that has so many possibilities for decorating.


I upped the decorative aspect of this project by adding a pretty Gypsy Soul Laser Cuts Flourished Frame- Valerie rectangle to the back panel, giving the project a little more height, then decorated the project with a vine piece from the Gypsy Soul Laser Cuts  Leaves and Flourishes set, along with paper leaves, flowers and mesh.


To create this project, I applied black ink to  the raw edges. I then glued pretty patterned paper to the base and both sides of the back panel. The paper pad I used also had some die cut borders, which I used on the small front panel. Once dry, I slotted all the pieces together and secured with liquid adhesive.


For the frame, I first gave the whole piece a coat of silver gilding wax. Next, I put liquid adhesive around the inner frame and sprinkled with glass glitter and mica fragments. I lined the back of the frame with co-ordinating patterned paper. I may even add a small photo into the frame at some point, but it is also nice on its own.


Finally I took the leaf flourish and coated it with silks paint in two shades. I used a cotton tip to apply the paint so that I could blend the two shades a little. Notice how I have glued it so that it is on both the front of the small panel, and on the base. I then tucked some mesh around the leaves and added small paper leaves and roses. I continued this onto the back left of the project and the top right to create a visual triangle.  A white ribbon bow was the final touch.

Thursday, August 23

It's beginning to look a little bit like Christmas

In the crafting world, designers alwasy get a bit of a head start when it come to Christmas. Products are designed and produced months ahead of the actual Christmas season. That works just fine for me, as I love Christmas. Working for Becca Feeken for Amazing Paper Grace feels like Christmas every single day. I am so lucky to get to create with her incredible new Christmas line called A Charming Christmas. You can see the whole collection here>>> 

If you checked out the blog hop last week, you will have gotten a preview of the whole collection. Your lovely comments on the blog tells me that this line will be a winner. 


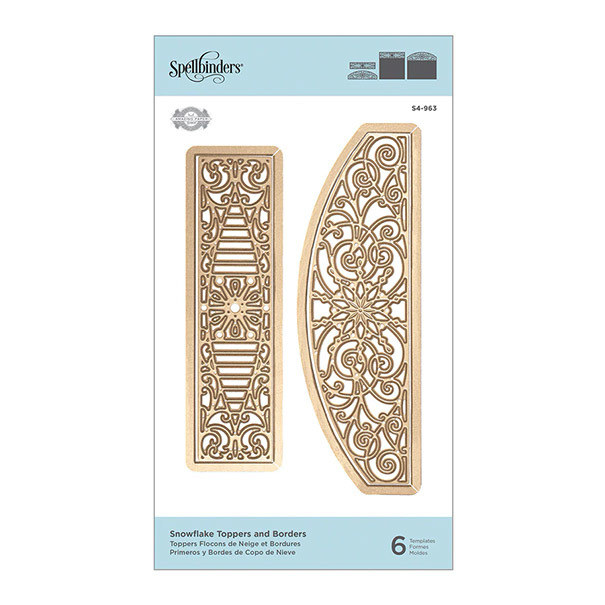
Today I have combined two different sets to make this card. First of all I used Snowflake Topper Borders. I love the intricacy of htis design, and the rounded shape really appealed to me.  I was totally inspired by Becca's beautiful sample last week, but I aso wanted to try using hte same dies in a different way, hence my centre opening design. Same dies, but a completley different look just proves how flexible this set is. Plus, there is a whole other piece that I didn't even use ...yet!

I also made use of the Holly Jolly Christmas set. The main border piece is amazing and I can't wait to show you that one in action, but for today I used the sentiment and the holly leaves in gold. 

Finally my favorite one that you will see me using lots and lots is the beautiful Cinch and go poinsettia flower. It is seriously so easy to make incredible flowers. The embossed detail is just perfect. 

Wednesday, August 15

Introducing Amazing Paper Grace - A Charming Christmas | Blog Hop


Tis the season to be jolly!  Even though it is only August, Christmas will be here in the blink of an eye.  I'm sure you are already listing out all the cards and gifts you're gonna make, right?  This year Becca of Amazing Paper Grace has designed a Christmas Collection - A Charming Christmas - for Spellbinders and we have a hop today to show you all the goodies and things we've made.  You can see the entire collection -----> HERE.

About A Charming Christmas Collection
Sweet little charms are so fun to play with, they can be dangled off of gifts, dangled off of cards and used in 3D Projects - they are just like the icing on the cake.  You will see that the "holiday" part of most of the sets in this collection have a Charm to personalize them - they are sized the same so you can mix and match them through your projects!  Here's the big deal: Outside of the charms and embellishments you add to make these dies Christmas, separately they can be used all year-round!! Yep, we're all budget shoppers too and want to get the most use out of a die!

Join us as each Creative Team member shares their creations with two dies from the collection.  Don't forget, each of us will be giving away an Amazing Paper Grace die pulled from the comments - one from each blog. The prize details are at the bottom of my post.  So, without further ado let me talk about the dies I get to introduce:

My Projects Today:


First up is Cinch and Go Poinsettia  


I get so excited when new flower dies come out, as they are my favourite thing to work with. These poinsettia dies come as a set of 4 different sizes. In the close up photo, notice the embossed details. I added extra shape and body by applying a stylus to the back, and then layering them two at a time. 


Second up is Charming Tag Pocket 


This is an interesting set. There are 7 different pieces which gives you a multitude of combinations and options, which is always a great idea in a die set. 

Availability:
These dies are available right now on the Spellbinders website -----> HERE

Prizes:
In the meantime, be sure you leave a comment on this post and every Creative Team Members post for a chance to win an Amazing Paper Grace Die from any previous collection (A Charming Christmas not included).

There are six dies that are being given away.  One name will be randomly picked from comments left on each of our six blogs on the Introducing Amazing Paper Grace - A Charming Christmas Collection post between August 15 and August 19, 2018, at midnight US Central Time.  We encourage all of our international friends to participate!  The randomly selected names will be announced on the Amazing Paper Grace Blog on August 20th.  (All giveaways for this hop are managed by and the responsibility of Amazing Paper Grace).

Up for grabs is an Amazing Paper Grace die of your choice from the Vintage Elegance Collection, the Graceful Borders Collection, the Venise Lace Collection, the Chantilly Lace Collection, the 3d Vignettes Collection or the Romancing the Swirl Collection.  

There will be a total of six dies and a winner can win once among all six blogs.  If your name is selected, simply claim it within 2 weeks of the announcement by sending your address through the form under the Contact Tab on the Amazing Paper Grace Blog.  There won't be a reply back but if you leave your choice, we'll get it, I promise.  Next thing you know, the die will show up at your door.   The dies will be mailed out from Amazing Paper Grace.

Click on the links to each member to help us get merry with the Charming Christmas Collection:

Visit Joanna  -  joannakrog.blogspot.com
Visit Teresa   -  victorianpaperqueen.blogspot.com
Visit Melissa  - keepsakesbymelissa.blogspot.com
Visit Judy       - judyhayesdesign.blogspot.com
Visit Alicia      - leishasblog.blogspot.com
Visit Becca     - amazingpapergrace.com

Thanks so much for joining into the fun with A Charming Christmas.
Leave a comment - tell us, how many Christmas Cards you plan to make this season !!

Saturday, August 11

Today I am sharing with you a mini book that I have made to remember our recent trip away.  I started with the Gyspy Soul Laser Cuts Bracket Edged Stagger album. This has a really nice collection of fancy edges.


I covered each of the pages with some nautical themed background pages. A tip for doing these easily, is to trace each page of the album onto the back of the patterned paper and cut it out first, then adhere. Another trick to get the edges nice is to gently sand them down once the glue has dried.

I love the use of jute on nautical themed projects as it gives the impression of ropes.


Next, I took the Gypsy Soul Laser Cuts Doodle Frame- rectangle and separated it into its 4 layers. I used silver gilding wax on the base layer, the outer frame was left natural and the inner frame was also dressed in silver wax. For the main upper layer, I coated it in regular fine sand, to really emphasise the ocean theme of my book.


A word of caution though. If adding a photo to the cover, use a copy, not an original, as I can't be sure of the long term effect of the sand on the photo.


 I didn't do too much to the inside of the mini album, as I want to have space to add photos once we sort through all 1700 of them. I used the Gypsy Soul Laser Cuts Beach Shape Set-small as my embellishments along with some tags from the paper collection I used. I left the Beach Set pieces in their natural form as I like the effect of the raw brown chipboard as a feature. The implied texture works in really well with a beach theme.


Supplies used: